Albatros D.Va - Exterior Details
Wingnut Wings - 1/32
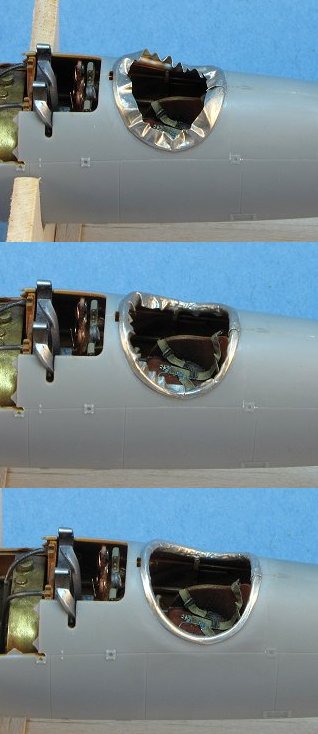
The coaming around the cockpit is flat. To add more dimension, some 1/2 round plastic strip was glued to the outside edge. 1st I made it it more pliable by pulling the strip across my fingernail much like the way a ribbon is pulled across and edge to make it curly.
Starting at the center at the back of the cockpit, a strip of lead foil is then glued in place. The progression of the photos shows how it is burnished over and into the interior of the cockpit. If you get a fold or two, that's a good thing. It will look like folds in the leather when it all done. The piece I used here was a bit too wide and it was a PITA to trim the inside.
For the fuselage drain holes the 1st thing was to was to of course... drill the holes. Wire was wrapped around the same bit and rings cut off and glued in place.
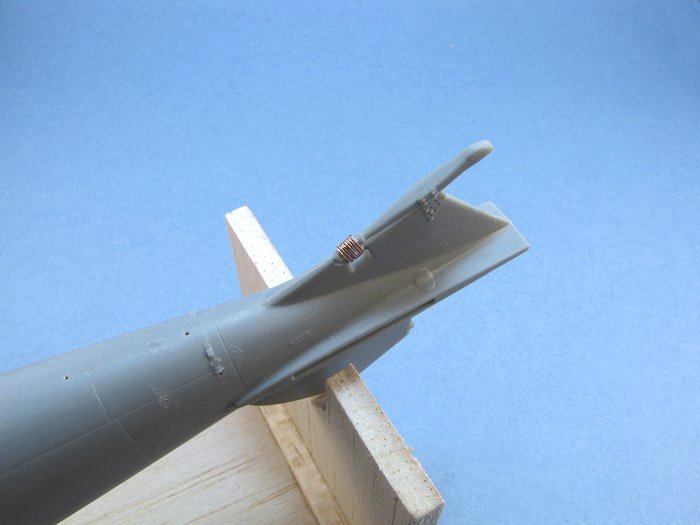
A small piece had to be cut from the tail skid to get in there to clean up the glue seam. A small piece of plastic card was wrapped with wire and glued back in to simulated that elastic shock cord.
The hinges on the tail and wings, while already pretty flat, were scraped a bit with a hobby knife. Small lead foil strips glued over the exiting hinges to give them more dimension. Like the coaming, this was pre-drilled for a 0.5 mm simulated hex bolt, again from Scale Hardware.
Take me back to the Albatros main page.
The gaps by the outer hinges were filled with some thin plastic card.


.jpg)
.jpg)

.jpg)
.jpg)