Albatros D.Va - Exterior Details
Wingnut Wings - 1/32
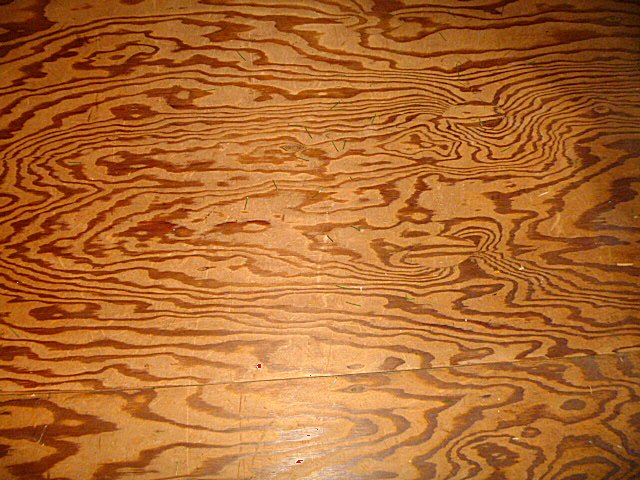
When time came to do the plywood skin I searched the web for ideas. And got lots of them. I tried a few that involved painting a pattern with a brush but I didn't get the results I had hope for. Being old enough to remember carbon paper (sigh) it gave me an idea. I went to one of the nearby home centers and pulled down a few sheets of plywood and snapped some photos. Got some weird looks from passers by. One guy asked why so I told him what my idea was. His mouth said "Cool" but his face still said "Weirdo".
The unedited photo of the plywood is of the full 4x8 foot sheet. Using the whole sheet makes it easy to scale it down to 1/32 when printed. Using a photo editing program I turned into black and white and raised the contrast to make the grain pop out as seen in the pics below. A base color of deck tan was applied and the area of a panel masked.
Cut the pattern into small section a little larger than the area masked. I took some brown weathering pigment and rubbed it into the back of the paper. A piece of tape just on one side holds it in place for the next steps and allows it to hinge back and forth to check the progress and go back to the same alignment. A blue pall point back was used to burnish the wood grain onto the fuselage. Using blue makes it easy to see your progress and not miss any spots.
The pattern from the paper is transferred t the fuselage. The use of pigments and the pressure from the pen gets it on the surface pretty good and it is fairly durable in normal handling. Since trying this I saw a different technique where artist pencils were used to give the pattern a more contracts and to add little dark areas to the grains like small knots in the wood etc.
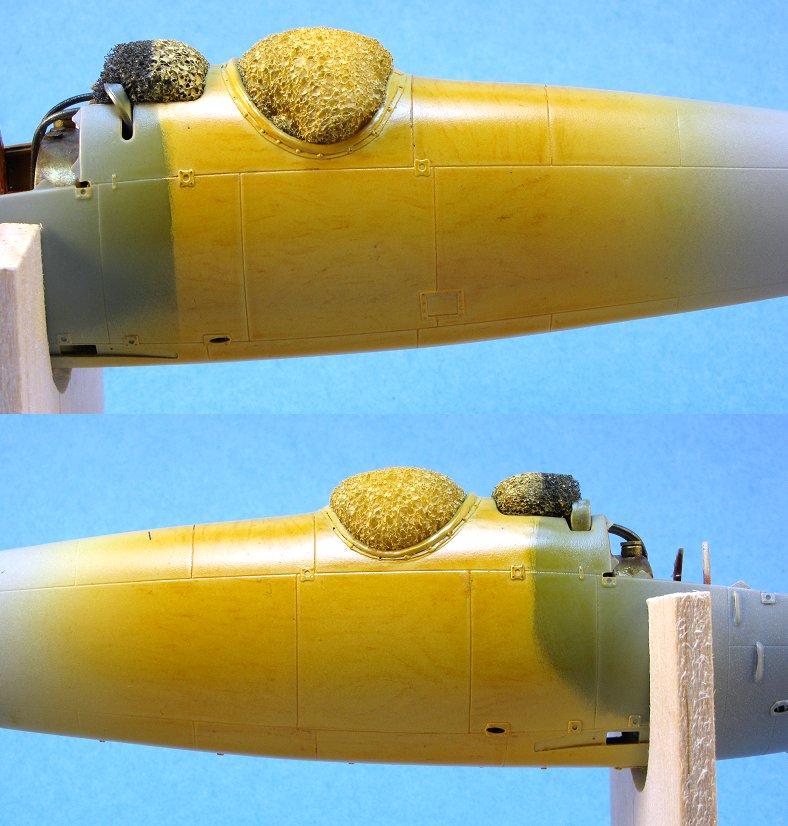
This was coated with 80/20 mix of Tamiya clear yellow and orange. It was thinned a little extra so very light coats could be built up to get a look I liked. The grain stands out a bit more in hand than in the photos but the effect is subtle.
The wood area was masked off for the Tamiya NATO Black on the front and rear sections. A gloss coat has been applied in prep for the decals.
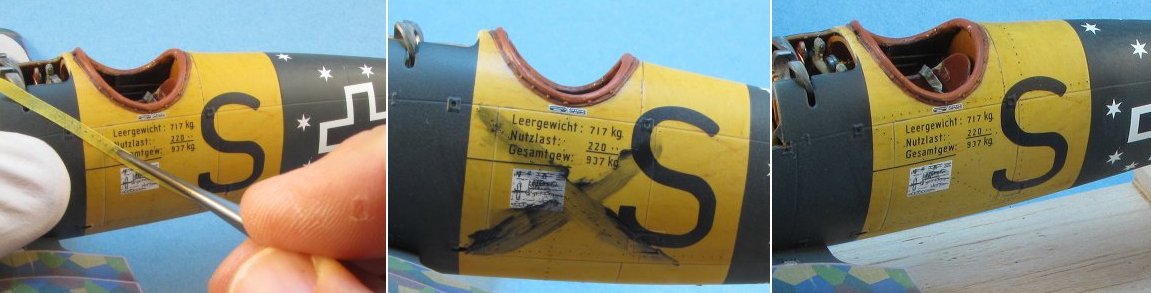
To make the nail heads on the fuselage, one of the more obvious details on a real Albatros, I marked strips of tape with the nail head spacing. This is placed on the fuselage and a sharp probe was used to make an impression at each mark If you have a riveting tool with the correct spacing that will make it even easier. Next time I will do this before any finishing since it can leave a little raised edge. I rolled the handle of a hobby knife over the lines of holes to flatten them out and it worked well enough.
Note there is already an acrylic flat coat applied. Some black artist oil paint was applied to the line of hole and wiped off with a paper towel that is barley damp with mineral spirits. By barely I mean it feels dry. Before you all email me... I know it was supped to be a diamond, not an X, on that panel.


.jpg)
.jpg)
.jpg)
.jpg)
.jpg)