Albatros D.Va - Wings & Rigging
Wingnut Wings - 1/32
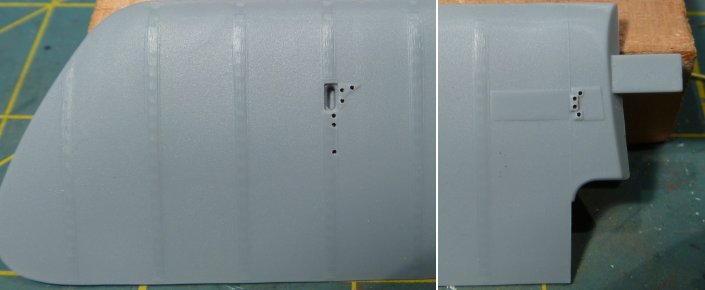
The first thing to do in preparing the wings is pre-drill the holes for the rigging. The Wingnut Wings kits have these all started but if you plan to use turnbuckles and eyelets they will need to be deeper to glue the eyelets in place. Care must be taken to not go all the way through. If you are using lozenge decals it is a good idea to snap a picture of the wing to make finding the holes afterward easy.
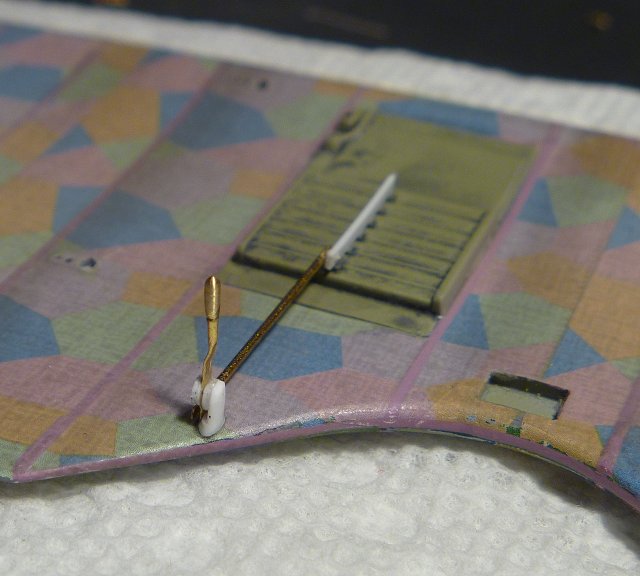
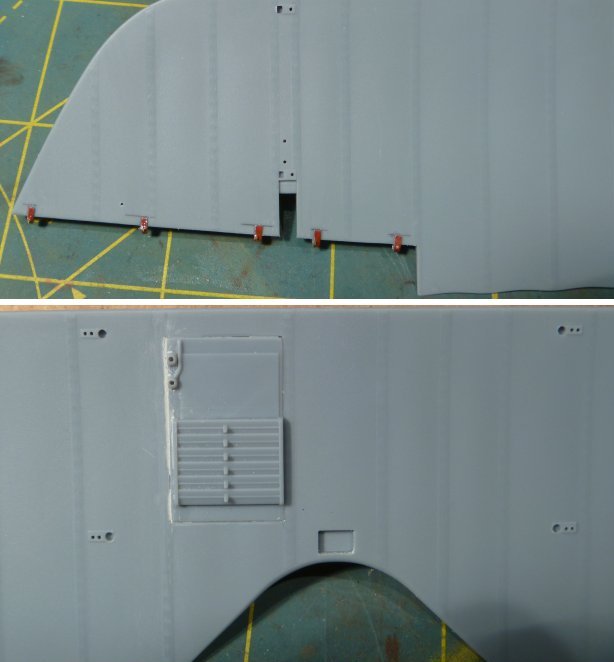
The aileron hinges, the red tabs, is a small detail that is easily improved. On the 1:1 it appears to be nothing more than a strap bolted to the wing and wrapped around the rod or tube that make the front of the aileron. Start by lightly sanding the raised detail off the wing leaving the small bit at the edge to use as a guide. A small strap of lead foil is wrapped around the back of the tab and glued in place with CA. Trim the length and drill a hole to insert a 0.5mm brass hex nut. Do this after the decals have been applied to the wings. As you see I didn't and getting the decals, 2 layers as you will see later, a real PITA to settle over the detail.
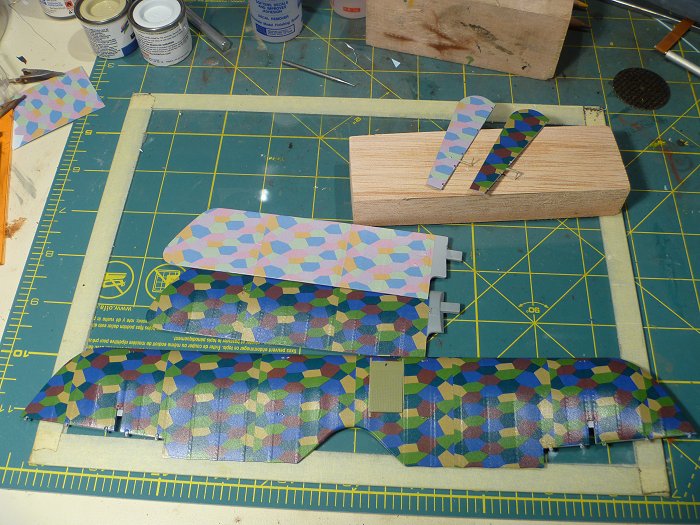
On the 1:1 a piece was commonly cut and turned 90 degrees to fit the wing from leading edge (LE) to trailing edge (TE). It may be set on a diagonal as well. The same has to be done with the decals. The decal sheet has long strips of lozenge that represent the cloth is if the material bolt was rolled out.
In the printing process there is a bit of overlap that darkens the edge. Almost invisible when looking at the strip as a whole but when the panels are turned and put edge to edge a very pronounced dark line appears. Before cutting the individual panels, use a long steel rule and a sharp hobby knife to trim about 1/64" of the color off both long edges of each strip.
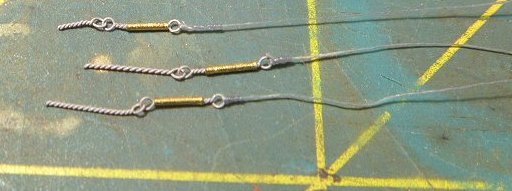
The aileron control horns were made with a piece of brass tube drilled to accept the turnbuckle that will connect to a cable.
There have been countless discussions regarding how smooth the wings surface really is, how much sag is there between the rib and how translucent the wings really are. On a model sometimes you have to through all that out and do some thing to give the impression of depth and dimension. Sometimes it looks too obvious during the process but the brain will usually take it all in and blend it together.
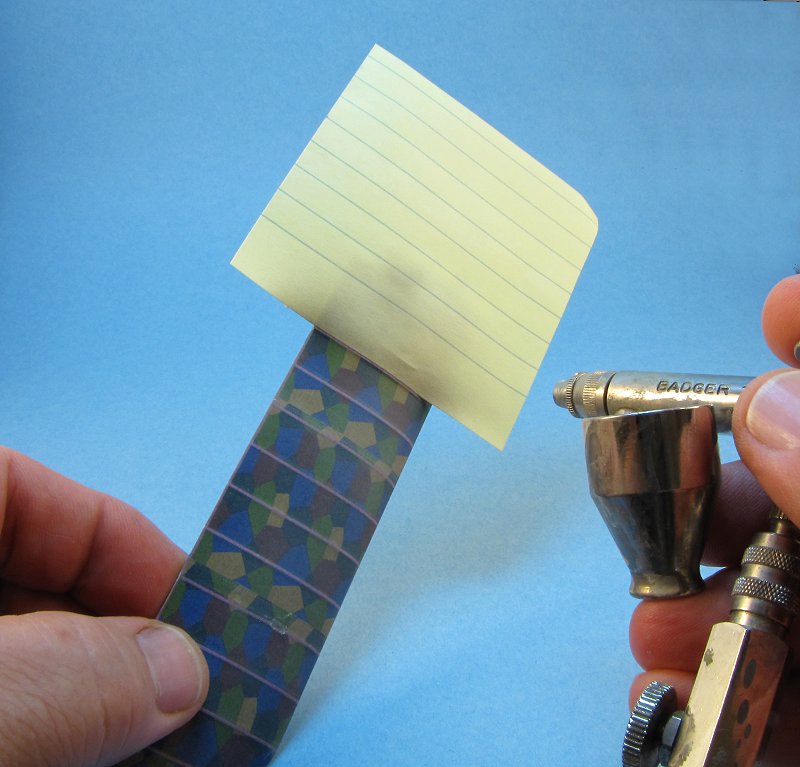
A perception of 3D can be added with a little paint. A thin mix of Tamiya Smoke is sprayed on one side of each rib giving it a little shadow effect to emphasis a bit of depth between each rib. A Post-It is perfect for this due to the low tack making it easy to move from rib to rib, keeping the shadow on the same side as you go along.
Side by side comparison showing the upper surface before and after shading...
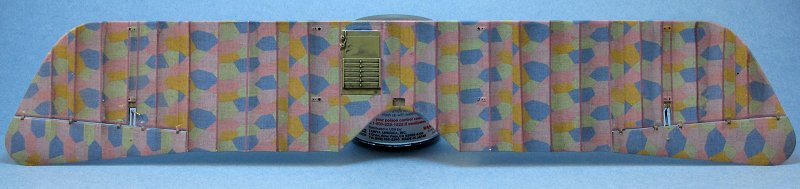
...and the completed lower surface.
step was to use a rivet tool, or ponce wheel, to make a line down one side of the lozenge panel seams. Rub a little contrasting pigment in to the depressions. Can you see the stitching on the real wing? It is doubtful but to me this falls into what Shep Paine referred to as the "impression of reality" which is true of some many details on a model, both added and out of the box.
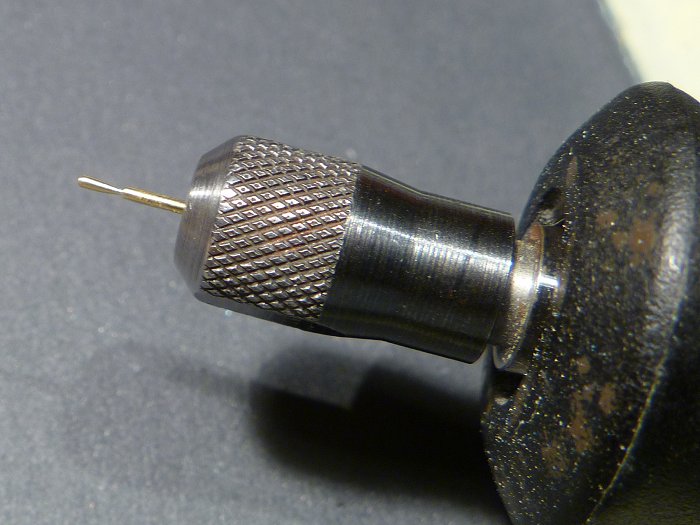
The handle for the radiator vent was made by turning a piece of brass rod in a Dremel against a file. The rest was made from brass tube and styrene.


.jpg)
.jpg)
.jpg)
.jpg)